Art Explorations: Typing Practice


For this class we need to learn to use technology tools. The first step is knowing how to type correctly.

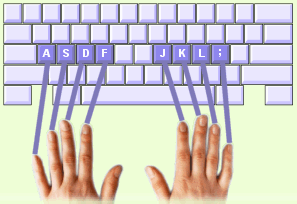
1. As a class we will discuss correct posture and placing your fingers on the "home" keys.
Then try Dance Mat Typing. Keep your volume low. Play just Level 1 (If the link isn't working, try the "Non-flash" version.

2. Once you have finished. Go to Typing with Booker.

3. Play Spider Typer

Welcome to Digital Arts Worksheet

Follow along with your worksheet and write down the answers.

Part 1: Procedure

1. This is the website you go to for ALL of your project directions (playgroundgraphics.blogspot.com). It is the blog that Ms. Fowler makes with all of her classes' assignments.
Now that you are on the correct website, add it to your favorites so you don't have to re-type it in every time you come to class. Look for the star in the upper left-hand corner of your browser window. Click on it and "add to favorites."

2. You should hand in your worksheets to the "Hand in work here" basket on the front table at the end of class.

3. If you finish a project early, you can explore the games and activities linked from this blog (on the right side). If you are on unapproved websites your computer will be locked.

4. Never shut down the computer by pressing the power button. If your computer freezes, ask Ms. Fowler what to do.

5. When you start a project, you should save it to your folder right away (the one with your last name). When you are finished with your project you should save it to your folder and the "HAND IN FINAL WORK HERE" folder. At the end of the class we will make a CD portfolio of all of your work. This will include everything that is in your last name folder. The "HAND IN FINAL WORK HERE" folder is where you hand in work to be graded. If you do not save your final projects into this folder, you will get a zero for that project.

6. Only Ms. Fowler will print your projects.

7. If you need help, sign up on the white-board, putting your name last. This is so you can keep working while you wait for Ms. Fowler to get to you. You do not need to raise your hand or shout.

8. Take some time to look through this blog, and visit some of the links on the right hand side. You can right-click and "open in a new tab" so you don't loose your place on this page. Write down three of the links you visited.

9. In order to view projects only for your class, click the appropriate tag under the post (for example, 7th graders should click the 7th grade tag).

10. Look at the projects for your grade. Which project looks like the most fun, and why?

Part 2: Vocabulary

1. Start by finding technology items in this picture (click) 

2. Now go to Tekmom and write down the definitions for the following words:
- browser
- icon
- software
- monitor
- pixel
- cursor

8th Digital Arts: Make a movie of your photo scavenger hunt pictures

1. Import your scavenger hunt pictures into Movie Maker
2. Add the title "Your Name Photo Scavenger Hunt" to the beginning of the movie.
3. Add a title before or on each picture (for example "Thin Line" or "Something Blue")
4. You can add music or sound (try searching the freesound project, tell Ms. Fowler what you want and she will download it for you to use
5. Save to the hand in work folder.
(photo by Faith T.)

CD Portfolios

It is nearing the end of the semester, and time for you to create a portfolio so you can take your work with you.

First we must save all of your projects as an image file. Most of your projects were created in Adobe Illustrator and Adobe Photoshop, only computers with that software will be able to open them (most people do not have Photoshop and Illustrator).
PART 1
First we need to save your projects so you can see them on any computer.
Here is how you do it:
1. Open each of your projects one at a time
2. Go to file > Save As > and save it as a JPEG into your portfolio folder. OR you may need to export. Go to File > Export > and export it as a jpeg.
3. You might not be able to save all of your project as JPEGs. That's okay, but you may not be able to see them on all computers.
4. If there are projects that you handed in and FORGOT to save into your own folder, you will have to ask Ms. Fowler to transfer the file.


PART 2
Now it is time to design a cover for your CD. You can choose to use either Photoshop, or Illustrator. You can design everything on the computer, or scan a drawing in first.

1. Create a new file that is 5 inches wide by 4.75 inches tall. If you are working in Photoshop, make the resolution 300 dpi.

2. You must include:
       Your full name
       Your grade
       "Portfolio"

3. Your design should show your personality. You could include pictures of your artwork. Try different fonts and if you use images from the internet, they must be copyright free (use the links on the right)!

4. Hand in your design to the "HAND IN FINAL WORK HERE" folder. Ms. Vermeer will print your design in color for your CD.

7th Art: Minimalism and Abstraction

Encore Newspaper

Look throught these news websites for kids and answer the questions on your worksheet:
IndyKids
Time for Kids
KidPost
TweenTribune
The Current Events

8th Digital Art: Soap packaging design

You will be designing an original and creative box for soap.

1. First do some research. Look at these links for ideas:
       Blue Q Soap
       Soap Packaging
2. Pick a theme for your package (punk, all natural,kids?)
3. Decide who you are selling too. Who is your customer?
4. Sketch your design
5. You must include a brand name, description, ingredients (sample ingredients: Glycerine, Palm Oil, Coconut Oil, Lauric Acid, Purified Water, Sodium Hydroxide, Sodium Lauryl Sulfate, Sorbitol, Triethanolamine, Sodium Chloride, Goat’s Milk Powder, EDTA, Titanium Dioxide , amount (3.2 oz), and a barcode (save from below).


6. Design your package in Adobe Illustrator. Make the size 8.5 by 11 inches.

7. Use a ruler to measure out each side of your box. Fit all of the pieces on to your page. We will print out this page in color so you can cut out the pieces and glue them on to your box.

8. Save your design to the “HAND IN FINAL WORK HERE” folder as “YourlastnameSoap.ai.”

7th Grade Digital Art: Stop Motion Part 2

1. Work in groups of two or three (your choice of groups this time).
2. For this stop motion you will be telling a story with objects or your bodies (instead of cut paper)

See examples:
3. Create a storyboard first
4. Your finished animation must be at least 30 seconds long (at .125 secs per frame, that's 240 pictures total)
5. You must include a title, sound and credits.

Write on the Wall

Now that you know more about what Digital Arts can be, go to the Digital Art Wall and answer this question:
What would you like to learn, or what projects would you like to do if you took this class again?

7th Art: Andy Warhol and Pop Art

1. First, go to the PowerPoint presentation and answer the questions on your worksheet.
Pop Art Presentation 

2. Use this presentation to answer the questions about artist Andy Warhol.


3. Logo Remix
You will be given a random logo to draw and remix


4. Make lists of possible subjects for your computer artwork.

Extra Credit (When you are done with everything)

1. Create a "Word Cloud" with words or a poem descibing you wordle.net
or
2. Get 10,000 points or more on freerice.com
or
3. Make a "Glog" on Glogster. It must have a subject or main idea and include writing and information.
4. Make an animation on Scratch!

Show Ms. Fowler when you are done for credit!

6th Grade Digital Art: Architecture

During this project you will be learning about Architecture and designing a modern home for a client. First we will look at some of the greatest buildings in history.
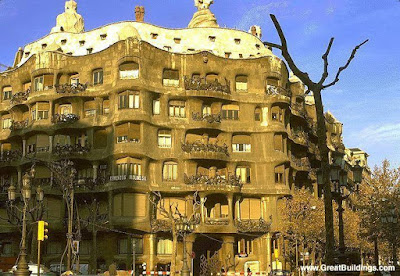

1.  Great Buildings
Go to Great Buildings. With a partner, look through the buildings and choose one you are interested in learning more about.
Answer the questions on your worksheet.
Choose an image and a drawing to present to the class.

Modern Architecture Video:


2. Modern Homes
Now we will look at some interesting and modern home designs.

Look at these houses, or these modern houses. Or HERE. Choose the house you would most want to live in.

Answer the questions in your packet.
*As a class we will discuss the “Great Buildings” and the modern homes you have chosen.

3. Architecture Basics
Now let’s learn the basics of architecture. Go to archkidtecture
What is architecture?
Who makes architecture?
Name some of the tools an architect uses:

4. Drawing a Floor Plan
Now let’s learn about plans, drawings, and sites.
What is a floor plan?
What is an elevation?

Click on “I want to be an architect!” and answer the questions.
Activity: You will design a house by making a floor plan.
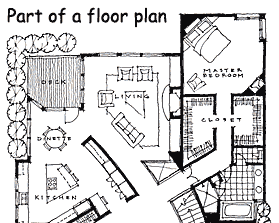


Architects draw floor plans to show how buildings will function. What rooms will the building have? Where will they be located? How will you get from one room to another? Where will the windows and doors go? These questions and more are answered by drawing a diagram as seen from above. So grab some paper and plan the layout of a house!

1. Make a list of all the rooms you think you will need.

Tip: Graph paper makes it easy to measure the sizes of rooms, doors, windows, kitchen and bathroom fixtures etc. Architects use many different tools to make their drawings neat and accurate. Rulers or "straight-edges" will help you draw straight lines.

2. You can use simple symbols to make your floor plan easy to read.
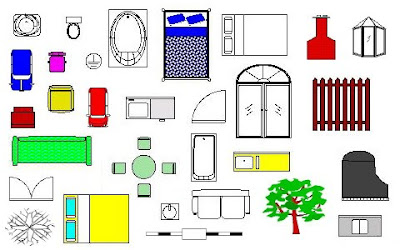

4. Now draw a sketch on scratch paper to decide where you want your rooms and how they will connect. You may want to label your rooms. Then draw a final version on drawing paper or graph paper. Use a pencil and draw lightly so you can make changes.

5. When you are happy with your drawing, draw over the pencil lines with a Sharpie Ultra-Fine marker to make the floor plan permanent.

5. Architect Studio 3D
Frank Lloyd Wright and Designing for a Client
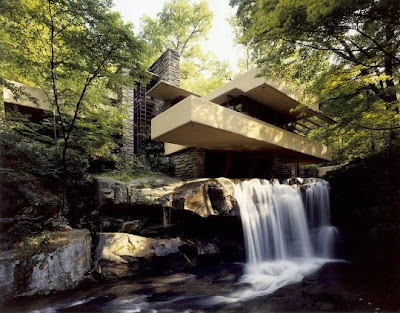
Learn about architecture and Frank Lloyd Wright through reading and designing a 3D model of a house for a client. Go to Architect Studio 3D to answer the questions on your worksheet.
8th Digital Art: Video Poems

For this project your will be creating a video poem using Windows Movie Maker. Use this blog post to complete your research and planning packets. Ms. Vermeer will show you examples.

1. Go to dictionary.com and write the definitions for the following words:

storyboard:
transition:
stanza:
pace:

Try using images that are figurative, rather than literal. When we designed concert posters we looked up these words. Please write down the difference between figurative and literal.


2. Find a poem (or write your own original poem!). Go to the Poetry Foundation and pick a poem. It must be short. Try for about 100 words or less. Also, make sure it is one you really like.

2. Storyboard. Plan out your video on the worksheet. Write down what words will be on the screen at the same time (break the poem up into stanzas), and what kind of picture will go with it. Use all 15 frames. If your poem is very short, there does not have to be text on every frame, or the text might stretch out over a few frames.

3. Find or make your pictures. You will use either copyright free photos or your own original art work. (You could try drawing in Photoshop or Illustrator!)

4. Put it all together in Windows Movie Maker. You will have to import your pictures and type the captions. Choose transition effects. Choose animation effects for your type. Change the fonts and colors.

5. Think about the pace of your movie. Try using a variety of shots: close-ups, far away, color, black and white. You should still make sure your images relate to each other. They should look like they belong together.

If you have time, you can try adding sound or music.

8th Digital Art: Fortune Cookie Posters


We will do a poster design project based on fortune cookie fortunes. Review the use of the tools, typography (the art of designing letters and words), and drawing in Illustrator.

Research and Planning
1. Select a random cookie. What you get is what you get!

2. Sketch your design. It could be a drawing or interesting type or a combination of both.
3. Look at these websites for some inspiration: 
LINK 1    
LINK 2   
LINK 3   


Design
1. Create a new document in Illustrator. Make it 11 inches wide by 17 inches tall. Name it "YourLastNameCookiePoster.ai"
2. Design something interesting, eye-catching, and fun.
3. When it is finished, save it to the HAND IN FINAL WORK HERE folder.

6th Grade Digital Art: Super School Lunch


For this project you will learn about health and nutrition to create a healthy school lunch. You will also pick a theme to create a second crazy school lunch.

For your CRAZY lunch, you will add pictures of food (or other things) to turn it into a "Super Crazy School Lunch." If you could get anything you wanted when you go through the lunch line, what would it be? Or, is it something disgusting? Is it a romantic school lunch? Is it out of this world?  

For your healthy school lunch, use what you learn about healthy eating and nutrition to create a healthy school lunch. Make sure you cover all the food groups!
    Follow along on your worksheet
    1. Learn about healthy foods and create a healthy meal HERE. 
    2. Try playing Dining Decisions. 
    3. Go shopping for healthy foods and read nutrition labels at the Virtual Grocery Store.
    4. Go to the Fowler folder in you 6th grade class folder. Open the picture of the lunch tray in Adobe Photoshop. Rename it as YourLastNameCrazyLunch (or YourLastNameHealthyLunch) and save it to your folder.
    5. Use Copyright Free images to add to your lunch tray. *Remember, google images may be copyright protected and you cannot use them without permission from the photographer.
    6. Use filters and image adjustments to change the color and look of the photos. You must use at least 5 (the more the better!) different pictures on each tray.
    7. Save both versions to the "HAND IN FINAL WORK HERE" folder.


7th Digital Art: Cut Paper Animation

For this project you will learn a little bit about the history and basics of animation, and create your own animation using cut paper, digital cameras, and Windows Movie Maker.

Vocabulary
First go to Word Central to look up these important vocabulary words. Make sure you write down the definition that relates to animation:
animation
animator
splice
pace

Research
Now learn some of the basics of animation. Go to Cartoonster and answer the questions on your worksheet. 
Stop-motion animation clips.


PES
toast
simple cut paper animation
getaway


Try playing this game: Sketch Star

Plan
You will work in groups to create your animations. It is up to you to decide who will have which responsibilities. First you must think of a simple idea for your animation. You have to make a lot of individual pictures (or frames) for an animation, so the simpler the idea, the better!
Some examples are:
a short scene between two characters, a night ski that fills up with stars, a cookie that gets bites taken out of it until it disappears, an ice cream cone that increases in scoops, a plant that grows and blooms, a ball that bounces across the page and back again, and a volcano starts erupting.
Once you have an idea, draw it on to the storyboard. You MUST have AT LEAST 16 frames.
 
Make
First we will make our sets and take photos. Then you will follow the steps on your worksheet to make your animation in Windows Movie Maker. Ms. Fowler will give you a demonstration.

Titles and Credits
Handmade Nation
Scrabble Commercial
Sweet Dreams

8th Grade Digital Art: "This is Me" Photography project

1. Complete the Photography Tips and Vocabulary Worksheet, use these links:
13 Lessons on Photography
Photography for Beginners
2. Read and sign "Camera Contract"
3. Check out cameras
4. Follow Ms. Fowler's directions on setting up your camera
5. Take 20 to 30 pictures that show who you are. Try close-ups, blurry or out of focus shots, different expressions, disguises, etc. You are trying to show the real you. Delete the pictures you don't like.
6. Pick the best 8 to 10 pictures to download into your classroom folder. Watch and demonstration on downloading your photos. When you do it yourself, follow the directions on your handout.
7. Try adjusting the color in Photoshop.You can go to Image > Adjustments > Auto Contrast or Auto Color.
8. Make a collage of your photos using Photoshop. Use each photo. You can cut them up or not.
9. Save your collage to the HAND IN FINAL WORK folder.
10. Have fun!

Painting and Drawing: Signs for the Edible Schoolyard

We will be painting pictures to be used in signs for the Columbia Heights Edible Schoolyard! Paint with watercolor using the techniques we practiced. It is important to paint the plant or vegetable realistically so that garden visitors know what they are!

Here are some pictures of the Schoolyard:


Here are some examples of garden signs:


7th Digital Arts: "The Wiz" Musical Posters

Our class will work on designing posters/flyers for the CMS fall musical "The Wiz." You can use either Photoshop or Illustrator when designing your posters. Please complete the research with a partner, but design on your own. The top designs will be chosen to be copied and put up all over Columbia Heights schools and businesses.

Research
1. What is the musical "The Wiz" about? Discuss it with your partner, and do some research on the internet. Write notes on your worksheet.

Brainstorm 
2. Write a list of possible images to include on your worksheet.
You can look at Google Images for The Wiz, or  Google Images For the Wizard of Oz Here.
 Here are some pictures Ms. Mahler sent us to give us an idea of the style:


Design
Start sketching your design. You MUST, that is M U S T, include all of the following information in your poster. You can copy and paste it from here into your text document (use Adobe Illustrator or MS Word to design you type).

The Wiz
Presented by Stages Theatre and Central Middle School
7:00pm on 
Thursday December 9th, Friday December 10th, and Saturday December 11th
at the Columbia Heights High School Auditorium
1400 49th Ave, Columbia Heights, MN 55421

A modern retelling of the Wizard of Oz using gospel pop rock and hip hop!
Dorothy goes Digital!

Adapted by Frank L. Baum’s “The Wizard of Oz”
Book by William F Brown
Music and Lyrics by Charlie Smalls
Additional Materials by Tina Tippit


6th Digital Art: Legendary Creatures


Myths and legends have entertained humans for thousands of years. These stories may entertain us, scare us, or teach us lessons.

You will use Photoshop to create a picture and then write a story about a legendary creature. These creatures are made up, like Bigfoot, the Loch Ness Monster, or the Chupacabra. Use this post to fill out the questions on your worksheet

1. Start by going to Word Central. Write the definitions for the following words:
mythological
legend
bigfoot
Loch Ness Monster
allegory
fable

2. Go to this List of Cryptids. Pick three. Write down the names, other names, status, descriptions, locations. Are there pictures?

3. Fables are made up stories that often have a lesson or moral. Go to this page on Aesop's Fables and chose one to read. Which one did you choose? What is the lesson?

4. Think up your own Legendary Creature. It may be a combination of lots of animals. It may be very big or very small. It may be from another planet or a time long ago.

5. First write the legend of your creature on the page provided. Use correct grammar and spelling. In your legend answer the questions: Where is it from? When did it exist? Where has it been spotted? What does it look like? What does it act like? What does it do? What does it eat?

6. These weird animals or (here) are all fake, and were created using Photoshop. Which is your favorite?

7. Now you should use Photoshop to create a picture of your creature. You may want to use pictures of other animals. Make your file 8 inches wide by 10 inches high. Set the resolution to 300 pixels per inch.

P.S. Don't forget what all of your tools do.